Wednesday, March 15, 2017

Post #7: Travel Journal

This post is completely created due to the fact that I will be traveling to Paris in three days!! Throughout my childhood I have traveled to many places around the United States. But this time, I get the opportunity to see something I've never seen or experienced before, an entirely different country.
I would like to give full disclosure, this is not a DIY pin from Pinterest, just a project simply inspired by a multitude of pins. A travel journal is simply a journal where you can write/collect your thoughts from the day while discovering a new place. The most fun part about a travel journal is the fact that it is totally customizable to each person's personality.
The list of supplies for this project was not very extensive and as a whole, relatively cheap ($15).
  • Notebook
  • Stickers
  • Scrapbook Paper
First I wanted to start on the cover of my notebook. I cut out a piece of scrapbook paper to fit the dimensions of the front cover.
 
Initially I planned on using mod podge to adhere the paper the cover, but soon realized that the material used for the cover would be too slippery to the paper to really stick. I made the decision to use tape to stick the paper on giving it a laminated effect. After the paper was all taped I added a sticker that said "adventure".
 
Once I flipped over the cover I decided it needed a little something on the inside too. I added letter stickers to spell out "Oh the places you'll go" from the classic Dr. Seuss children's book.
Another main section I wanted to customize was the folder pages in the middle of the notebook. This will be used to store, tickets, brochures, cards, and other miscellaneous things I get in Paris. I used the map print scrapbook paper to cover the yellow folder pages. Once again I used the faux laminated approach to stick the paper to the folder page.
 
 
For the pages with actual lines on them I simply added different and random stickers to the outside edge of the pages and left room for writing. I made sure to customize the first few pages of the journal to a Paris theme considered that will be the first place that the notebook will be used.


This was a very fun project for me, it made me even more excited for my trip to Paris. I hope this will inspire some of you to make a travel journal someday, that you can keep and read for a lifetime.

Tuesday, March 14, 2017

Post #6: Earphone Holder

As I start my journey of packing for my upcoming trip out of the country, I am scrolling through Pinterest more and more for interesting travel hacks. I have been on one trip that the plane ride lasted over 7 hours, and I realized very quickly that my headphones were an essential part in that journey. So when I came across this pin I knew I had to try it, because my headphones always end up at the very bottom of my purse and tied in a knot! This solution will be great for my approaching trip. In the pin, it seems very user friendly and easy to do that's why I was so optimistic about doing it.
Fortunately, this pin required very few supplies (I found all of them around my house).
  • Mint container
  • Scissors
  • Something to trace the circles with
  • Mod Podge
  • Sponge Brush
  • Scrapbook paper 
We start this procedure by peeling off the front and back labels of the mint container.


Then, we find something that is approximately the same size as the container to trace. The mistake I made here, was I found a water bottle that was bigger than the opening flap of the mint container. So in later steps I had to trim down the edges of the circles.
 
 
After the circles were cut, we add a small amount of mod podge to the back of the scrapbook paper and place the cutouts onto the mint container and let dry.
 
 
Once the paper feels dry, add another layer of mod podge on top of the paper to seal it to the mint container and let dry. Just like that we have a cute little earphone holder.
 
 
(Result from having to trim the edges of the paper, making it look like a really bad circle.)

There were many mess-ups that resulted from this project. I needed a smaller thing to trace my circles with. My headphones did not fit in the container very comfortably. The biggest fail, the paper started to come up just days after letting it dry. Although these mistakes could have been prevented, I still did not get the results I was hoping for, therefore this pin officially goes on the BAD LIST.

Thursday, March 9, 2017

Post #5: Lavonte (SLIME!)

While procrastination has become a major factor in my second semester of college, I find my self scrolling through the pages of Pinterest more and more. When I came across a pin about homemade slime, I didn't think much about it. Then after a night of well needed sleep I got back on my Pinterest and saw the same pin again, but this time the kid inside of me bubbled over and my mind was made up! I was going to make glittery slime!

This project is much more simple and less time consuming than any pin I have put to the test before. It only requires 5 simple ingredients.
    Water
    Borax
    Food Coloring
    Glitter
    Elmer's Glue
To start I simply emptied an entire tube of Elmer's Glue (4 oz) in a bowl.
 Then I poured 1/2 a cup of water and mixed the two completely.
 The fun parts began when I added the food coloring and glitter. Three to four drops of blue food coloring gave the mixture the exact color I was hoping for. The glitter on the other hand, 1 Tbsp. of glitter was more than enough to give the slime the sparkle it needed.
 
 After mixing in the food coloring and glitter completely, I combined 1/2 a tsp of borax and 1/4 c. of hot water and mixed until it was dissolved. When the water was clear I added it to the glue mixture and began stirring.  
 The mixture quickly began to form until a glob of gooey-ness.
 After a minute or two of "working"/kneading the slime it became more pliable and less wet.
 Reilly Peuser absolutely loved this pin project. She went on to naming the slime "Lavonte".

I was not originally planning on testing a pin like this but with slime's growing popularity I just couldn't pass up the offer.
"Lavonte" has the honor of being on the Good List!


Sunday, March 5, 2017

Post #4: Salted Caramel Pretzel Chocolate Chip Cookies

This week I decided to attempt something a little bit different, baking! When I came across this pin I instantly knew I wanted to try these cookies.

When baking you usually don't have all of the ingredients laying around the house so I always have to make a trip to the store. My favorite place to get my "supplies" for my baking experience is at Dillons at the corner of 21st and Fairlawn in Topeka.

For this project I have decided to present the procedure through a slide show presentation.

Step details, listed below;

Step 1: In a medium bowl, whisk together flour, baking powder, baking soda, and salt.
Step 2: Using a mixer, cream butter and sugars together for about 3 minutes. Add in eggs and vanilla and mix until combined.
Step 3: With the mixer on low, slowly add in the dry ingredients. Stir in the choc. chips and chopped pretzels.
Step 3: Part 2?: This is when we realized we forgot to add the brown sugar in step 2 so we took a risk and added it in to the already mixed batter.
Step 4: Form the cookie dough into balls. Place a caramel piece in the center of the dough ball, making sure the cookie dough completely covers the caramel. Place on parchment lined baking sheet, about 2 inches apart. Gently press a pretzel twist on top of each cookie and sprinkle sea salt on each cookie.
Step 5: Bake cookies for 10-12 minutes (we waited 15 minutes) at 350 degrees, Remove from oven and let cool on the baking sheet for 2-3 minutes (we attempted to remove them after 3 minutes but waited about 5 instead because the caramel wasn't cool yet).

This project has been one of the more fun experiences I have had simply because I got to do it with my friends. As we started the project I had a lot of doubts because I have always failed at every attempt I've made at baking. Then we forgot to add the brown sugar and I knew that there was no way this was going to turn out okay. But to my disbelief the cookies turned out much better than expected. We still ran into a few problems but I only spent $18 and the cookies tasted good so I had to officially deem this pin as........
Pinterest-ing!

Sunday, February 26, 2017

Post #3: Pom-Pom Rug

WARNING: This project feels like it takes eternity to finish.

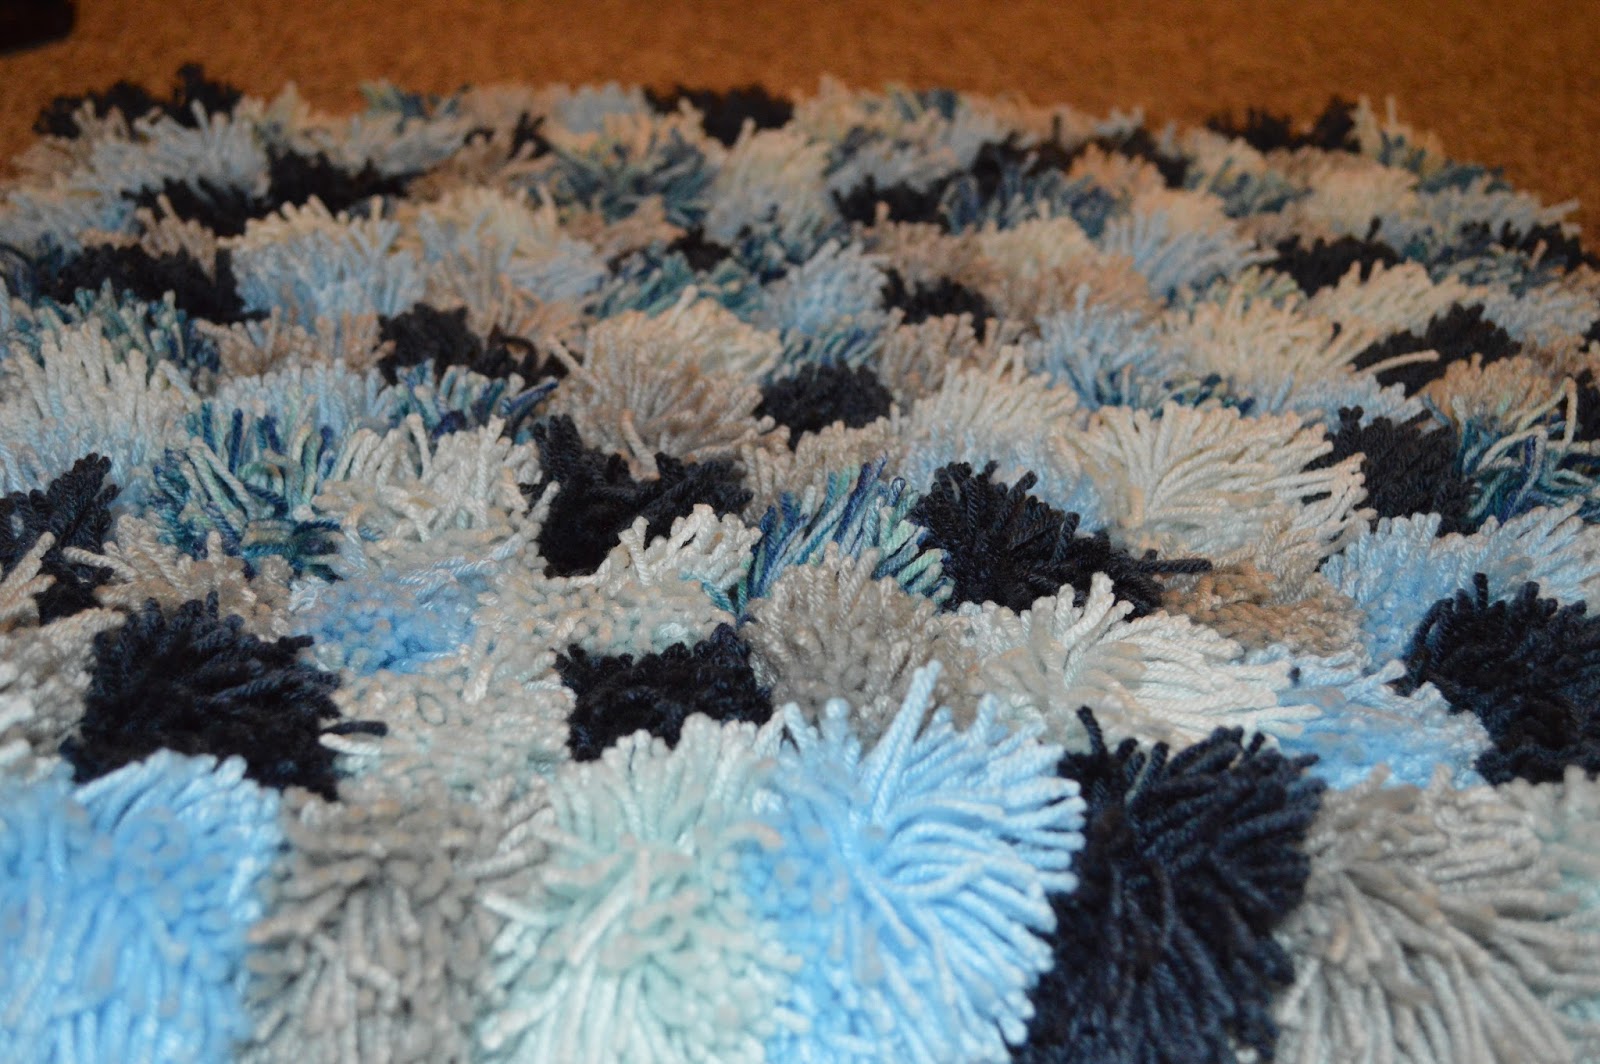
    As I was scrolling through Pinterest figuring out what pin I was going to recreate I stumbled upon a Pom-Pom Rug. I had never seen a pom-pom rug so I was very excited to try it. Little did I know that this project would entail getting sores on my fingers and taking three days to get done. But that is just fine with me because I really enjoyed the way it turned out.
    The link to the pin can be found here.
Supplies:
    Something to wrap yarn around
    Scissors
    Yarn
    Rug Mat
The pin suggest using a paper towel tube and cutting it in half, then using that to wrap the yarn around. But I forgot to grab the tube from my trash can so the water bottle was the best thing I could find.
 After using the water bottle for one yarn pom-pom I quickly discovered that the water bottle was not my best option so I decided to wrap the yarn around my hand instead.
 Once the yarn was wrapped around my hand 90 times, I removed the bundle from my hand and laid it on the table. Next I cut another piece of yarn (about 12 inches). I then placed the coiled yarn on top, and tied a knot with this 12-inch piece. I cut only the ends of the looped yarn to make the pom-pom.
The next step is to thread the pom-pom tails through the mat. I tied a knot at the ends of the tails. Then began to fill in the rest of the mat and cut the ends of the tails off.
 I started on the rug and finished three days later, the three days consisted of a lot of Netflix and quite a few blisters forming on my fingers from wrapping the yarn around them. But even though it took many, many hours I am really excited about how the rug turned out.
Unfortunately this project ended up being a lot more expensive and a lot more time consuming than originally hoped. I had to buy 11 skeins of yarn priced at $3.99 along with a rug mat at $5.99 resulting in a $50 mat. In retrospect that is a good price for that size of rug, but on a college budget it was more than I wanted.

Although this rug turned out extremely cute and perfect for my room, the high prices and long process I am going to have the put this pin on the...... Pinterest-ing List!