Friday, April 21, 2017

Post #13: Sharpie Coasters


The Sharpie Coasters were a very cheap DIY project to do. The supplies, consisted of things just laying around the house.
Supplies:
  • Two plain bathroom tiles
  • Rubbing Alcohol
  • Sharpies (any color)
  • Something to drop the alcohol with i.e a straw
Step 1: Lay out something to prevent possible messes. We used a trash bag that was cut in half.
Step 2: Draw a design on the first tile.
Step 3: Drip dots of rubbing alcohol on the tile, and wait for it to expand. Unfortunately for us, the rubbing alcohol did not expand properly so we tried rubbing it in. That also did not work, resulting in the sharpie design coming off.
Step 4: We tried again on a new tile, redoing step 2.
Step 5: Drip dots of rubbing alcohol on the title. This time the first two dots removed the marker from the tile on its own. We added a few more to see if the rubbing alcohol would do it again.
Step 6: We wanted to see if coloring with another marker would make it look different. It did!!
This pin turned out to be more of an experiment than a tester. The results were not what we were expecting, resulting in the sharpie coasters moving to the Bad List. 

Friday, April 7, 2017

Post #11: 5 Minute Peanut Butter Pie

For those un-American pie lovers (oreo, pudding, peanut butter instead of fruit fillings) the peanut butter pie stands at the top of the list. I was craving something with a little sweetness but also some rich components. This pin was the perfect combination of both of those flavors. As a plus, it only took about 10 minutes (I'm a little slower than the creator of the pin!). The supplies, instructions, and price ($16 from Dillion's) are all so manageable.
Supplies:
  • Reese’s peanut butter chips (optional)
  • 8oz Cool Whip
  • 2 tbsp milk or milk substitute
  • 1/2 cup of peanut butter
  • 3/4 cup of powdered sugar
  • 8oz cream cheese
  • 9 inch graham cracker crust
1. In a large bowl beat cream cheese and powdered sugar until fluffy.
 
 
2. Next add peanut butter and milk. Beat until creamy.
 
 
3. Fold in Cool Whip.
 
 
4. Pour into pie crust and serve immediately or chill overnight. Garnish with Reese’s peanut butter chips for extra goodness.
 
 
See? Didn’t I tell you it was only 10 minutes!
So easy, and delicious!
So light and fluffy too.
Perfect for a Springtime dessert!
 
 
This pie was the biggest success since starting the blog, purely because it was so delicious! It is quite obvious that this will be at the top of the Good List!

Wednesday, April 5, 2017

Post #10: T-Shirt bag

Cheap, cheap, cheap was the main priority this week. I wanted to make something out of what I already had in the house. I came across this pin and thought, who doesn't have an old t-shirt laying around that they don't necessarily want but cant get rid of? So, why now make it into a bag! My intention was to make this bag out of a Washburn shirt and use it as my beach bag, that way if sand gets on it, the bag isn't ruined just dirty.
The supplies needed:
  • Scissors
  • T-Shirt
It's that simple!!
1. Fold the t-shirt on it's side so when the cutting begins, the sides are identical.
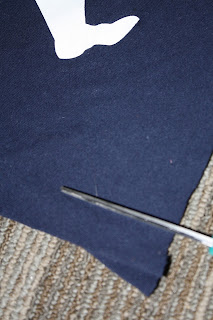
2. Cut the sleeves on the t-shirt. (the openings will become the handles.)
 
3. Keep the shirt folded and cut out the neckline, this will allow for a bigger area to place your items in and smaller straps.
 
 
4. Unfold the shirt. Find something that represents how big you want the bag to be. Hint: there will  be an inch cut of from the bottom so overcompensate a little bit.
5. From the bottom of the t-shirt, cut one inch long lines along the entire bottom of the shirt. Make sure that all of the strips of fabric line up with each other. Eventually they will be tied together.
6. Turn the shirt inside out and make sure to realign all of the strips of fabric.
7. Going down the row tie each of the front and back strips together, I double-knotted them but depending on the amount of strips you have one knot could suffice.
 8. I then gathered different strips from different knots and tied those together so there would be less holes in the bottom of the bag.
9. Turn the bag back out so the logos/print is on the outside and now we have a cute bag!
 
 
After really trying to use the bag I soon realized that the side slits, were way to big! If I put anything in the bag that was above 5 inches, it was going to fall out. Another aesthetic issue I began to notice is the bag looked much more rectangular than circular, of course that is personal preference. Even though this bag was cheap and only took about 20 minutes to make, I am definitely going to have to put this bag on the Bad List!

Thursday, March 30, 2017

Post #9: A Wreath for Spring

Here in Kansas the season of Spring can be described several different ways; tornado season, 40 degree weather, 90 degree weather, windy, stormy, dry, wet. Point is you never really know what kind of weather will come throughout the day. So I figured I make the most of the unexpected and create a (nice) spring inspired wreath. The pin that inspired me to make this of course looks much better, but I did try to stick with the bright colors of spring the best I could! The supplies I used only totaled up to $16 at hobby lobby, they are currently having a sale of 50% all flowers.
Supplies:
  • Flowers of choice
  • Wooden Wreath
  • Hot Glue Gun
  • Glue Sticks (just in case)
  • Burlap
Thankfully for this project I had help from my best friend Courtney Holthaus who has made a wreath before so she showed me the ropes pretty well. We first started by taking the yellow flowers off of the stems.
Then we began places flowers around the wreath to find the perfect layout. Once we got the blue flowers in place we began to hot glue the stem in place. We ran into a problem, the glue would fall straight throw the wreath and wouldn't keep the stem on the wood. So we decided to flip the wreath upside down and pump as much glue as possible through the wood. That method actually ended up working very well, so we stuck with it.
 
 
After finally figuring out the best method to apply the decorations/flowers we added the yellow flowers and some leaves to finish up the spring look we were going for.
 
For this wreath I really wanted to add a burlap bow somewhere on it. Fortunately, Courtney knew exactly how to make one. She simply layered the fabric, gathered it in the middle and tied a ponytail around the center. Then we added a thin strip of burlap around the ponytail so we couldn't see the black of the ponytail.
 
 
For the finishing touch we glued the bow at an angle onto the wreath.
 
 
We decided the best place for a new spring wreath would be on the front door of course!
 
I am very happy with how the wreath turned out. When we began making it I thought that it was going to be much harder to make it. Now that I have made one wreath I am excited to keep making more and more for various seasons. This time it is a very easy decision to put this spring time wreath of the Good List!

Wednesday, March 29, 2017

Post #8: Watercolor Mug

Cheap mugs and nail polish, who doesn't love that combination? I recently came across a new DIY that I've only seen used on actual fingernails. But in this pin we replace the nails with a cheap white mug from target ($1.99)!! For this pin, the only thing you really need is water, a mug, and nail polish. I think that is what made this project so attractive, the simplicity of it.
Supplies:
  • Mug
  • Plastic Tub for water
  • Nail Polish
  • Kleenex or Paper Towel to let dry
This project really only takes a few minutes to do, really because if you don't move fast, there is a possibility of the nail polish creating a "hard" film on the water. So the first step is to add a few drops of the nail polish of your choice to the water.
After the nail polish has expanded in the water, dip the mug into the water and let dry.
 
 
So, I thought I was done. Then my friends encouraged me to add another color to it to make it look even more unique so I cleaned the water and added a few drops of a different nail polish to the water.
I repeated the step of dipping the mug in the water and letting it dry.
The end result was definitely not what I was expected, it reminded me vaguely of a piece of art a kindergartener might construct if they find their mother's nail polish in the cabinet. But I think that effect only occurred because I added the second color instead of just sticking to the green polish.
 
Before I added the second color, I was going to let this mug reside on the Good List. But after careful consideration I must move it to the Pinterest-ing List.